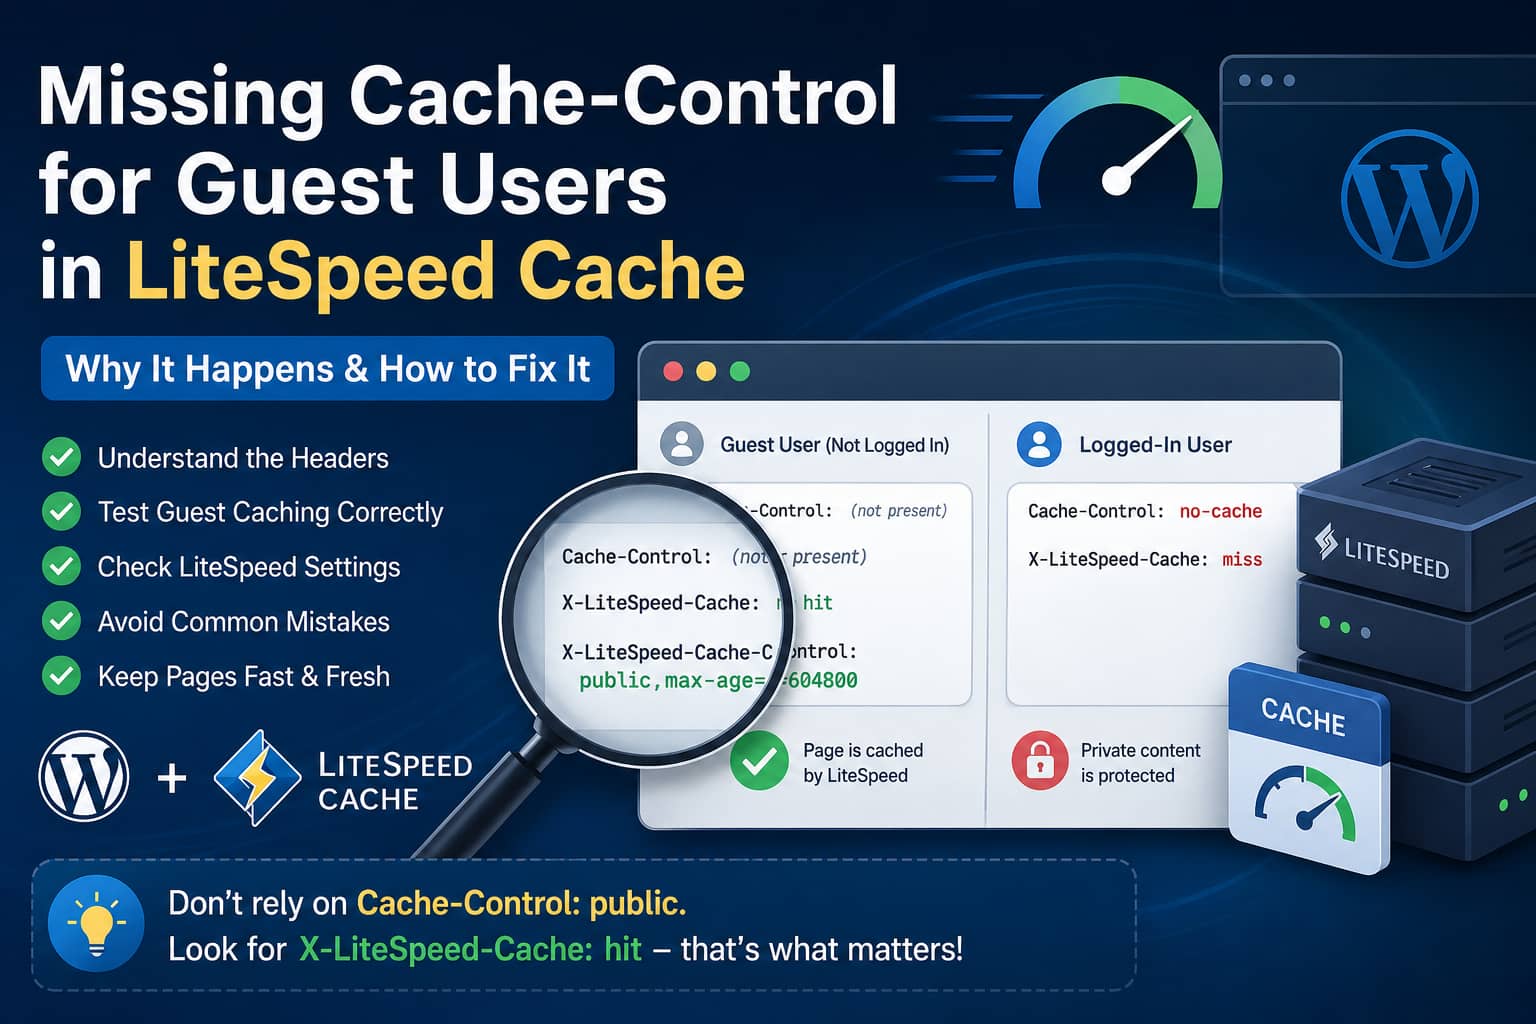
A WordPress website using the LiteSpeed Cache plugin may show different response headers for logged-in and logged-out visitors.
For example, a logged-in request may return:
Cache-Control: no-cacheHowever, the same page viewed as a guest may not include:
Cache-Control: publicThis can make it appear that LiteSpeed is not publicly caching pages for anonymous visitors.
In most cases, however, the missing standard Cache-Control: public header does not mean that LiteSpeed page caching is broken. LiteSpeed uses its own server-level cache headers, and these must be checked separately from the browser’s standard Cache-Control header.
This guide explains why the header may be missing, how to confirm whether LiteSpeed Cache is working, which settings to inspect and how to safely configure caching without causing stale WordPress pages.
The Main Cause
LiteSpeed full-page caching and browser caching are two separate caching systems.
LiteSpeed Cache stores a generated WordPress page as a server-side HTML cache object. When another visitor requests that page, LiteSpeed can serve the stored copy without loading WordPress or PHP again.
The standard HTTP header:
Cache-Control: publicprimarily controls whether browsers, CDNs and other shared proxies may store the response.
LiteSpeed’s server-level page cache is instead identified using headers such as:
X-LiteSpeed-Cache: miss
X-LiteSpeed-Cache: hit
X-LiteSpeed-Cache-Control: public,max-age=604800
Therefore, a guest page can be publicly cached by LiteSpeed even when the normal Cache-Control: public header is absent.
Is the Missing Cache-Control Header a Problem?
Not necessarily.
The most important header for confirming LiteSpeed page caching is:
X-LiteSpeed-CacheA response showing:
X-LiteSpeed-Cache: hitmeans that LiteSpeed served the page from its server-level cache.
A response showing:
X-LiteSpeed-Cache: missmeans the page was not already in the cache, but LiteSpeed may have generated and stored a cache object for the next request.
When an uncached page is generated, you may also see:
X-LiteSpeed-Cache-Control: public,max-age=604800On the next request, the important result is:
X-LiteSpeed-Cache: hitLiteSpeed’s official verification process also relies on the X-LiteSpeed-Cache header rather than requiring a standard Cache-Control: public response.
Why Logged-In Users Receive Cache-Control: no-cache
Logged-in WordPress pages may contain private or user-specific information, including:
- The WordPress admin bar
- Account details
- Membership content
- Shopping-cart information
- Personalized pricing
- Saved form data
- Nonces and security tokens
Serving a publicly cached copy of one logged-in user’s page to another user could expose private information or produce incorrect content.
For this reason, WordPress commonly sends headers such as:
Cache-Control: no-cache, must-revalidate, max-age=0LiteSpeed may bypass the public cache for logged-in users or store their pages in a separate private cache.
The LiteSpeed Cache setting named Cache Logged-in Users stores logged-in pages in private cache using the visitor’s IP address and session ID.
The presence of:
Cache-Control: no-cachefor a logged-in request is therefore usually expected behavior and should not be copied to anonymous-user testing.
How to Test LiteSpeed Guest Page Caching Correctly
Always test page caching while completely logged out of WordPress.
Using a normal browser window can produce misleading results because WordPress login cookies may remain active after the administrator dashboard is closed.
Step 1: Open a private browser window
Use one of the following:
- Chrome Incognito
- Firefox Private Window
- Microsoft Edge InPrivate
- Safari Private Browsing
Do not log in to WordPress in that window.
Step 2: Purge LiteSpeed Cache
In the WordPress dashboard, go to:
LiteSpeed Cache > Toolbox > PurgeClick:
Purge AllYou can also use the LiteSpeed icon in the WordPress admin toolbar and select Purge All.
Step 3: Load the page once
Open the affected public page in the private browser window.
Open Developer Tools using:
F12Select the Network tab and reload the page.
Click the first document request. This is normally the page URL itself rather than a CSS, JavaScript or image request.
Under Response Headers, look for:
X-LiteSpeed-Cache: missYou may also see:
X-LiteSpeed-Cache-Control: public,max-age=604800A first-request miss is normal because the cache was just purged.
Step 4: Reload the same page
Reload the page without changing the URL.
The second response should normally include:
X-LiteSpeed-Cache: hitThis confirms that LiteSpeed is serving the page from its public server cache.
The standard header below is not required for this result:
Cache-Control: publicTest LiteSpeed Cache Using cURL
You can also inspect the response from a terminal.
Replace the example address with the page you want to test:
curl -s -o /dev/null -D - \
  -A "Mozilla/5.0" \
  https://example.com/test-page/
Run the command twice.
The first request may show:
x-litespeed-cache: miss
x-litespeed-cache-control: public,max-age=604800
The second request should show:
x-litespeed-cache: hitUsing a normal browser user agent is useful because some security systems, CDNs or server configurations treat command-line requests differently from browser requests.
You can display only the relevant headers with:
curl -s -o /dev/null -D - \
  -A "Mozilla/5.0" \
  https://example.com/test-page/ |
grep -iE "cache-control|x-litespeed-cache|x-qc-cache|age|server"
On Windows PowerShell, use:
curl.exe -s -o NUL -D - -A "Mozilla/5.0" https://example.com/test-page/Headers That Confirm LiteSpeed or QUIC.cloud Caching
Depending on the hosting and CDN configuration, you may see different cache-status headers.
LiteSpeed Web Server
X-LiteSpeed-Cache: hitor:
X-LiteSpeed-Cache: missLiteSpeed Web ADC
X-LSADC-Cache: hitQUIC.cloud CDN
X-QC-Cache: hit
X-QC-Pop: server-location
LiteSpeed documentation recognizes these alternative headers as valid indications that the cache is working.
Solution 1: Confirm That Page Cache Is Enabled
In WordPress, go to:
LiteSpeed Cache > Cache > CacheCheck:
Enable Cache: ONWhen this option is disabled, LiteSpeed will not create new page-cache objects and existing cache content may be purged.
After enabling it:
- Save the settings.
- Purge all LiteSpeed cache.
- Open a guest page once.
- Reload it.
- Check for
X-LiteSpeed-Cache: hit.
Solution 2: Confirm That the Server Supports LiteSpeed Page Cache
Installing the LiteSpeed Cache plugin alone does not guarantee that server-level page caching will work.
The page-cache functionality requires one of the following:
- LiteSpeed Web Server with its cache module enabled
- OpenLiteSpeed with a working cache configuration
- QUIC.cloud CDN page caching
The optimization features of the plugin can still work on Apache or Nginx, but LiteSpeed’s native server-level full-page caching is not available without a compatible cache engine or QUIC.cloud.
Check the response header:
Server: LiteSpeedThis can help identify the web server, but the decisive test is whether you receive one of these:
X-LiteSpeed-Cache: hit
X-LiteSpeed-Cache: miss
X-QC-Cache: hit
X-QC-Cache: miss
When none of these headers appear, contact the hosting provider and ask whether the LiteSpeed cache module is enabled for the domain.
Solution 3: Check the Public Cache TTL
Go to:
LiteSpeed Cache > Cache > TTLCheck:
Default Public Cache TTLThe documented default value is:
604800This equals one week.
LiteSpeed allows other values of at least 30 seconds, including:
3600     = 1 hour
86400    = 1 day
604800   = 1 week
1209600  = 2 weeks
The public TTL controls how long most publicly cached pages remain in LiteSpeed’s page cache.
A sensible starting configuration for a normal WordPress blog is:
Default Public Cache TTL: 604800
Default Front Page TTL: 86400 or 604800
LiteSpeed automatically purges relevant cached pages when posts and pages are updated, so a long server-cache TTL is usually safer than an equally long browser-cache TTL.
Solution 4: Review Cache Exclusions
Go to:
LiteSpeed Cache > Cache > ExcludesReview the following fields:
- Do Not Cache URIs
- Do Not Cache Query Strings
- Do Not Cache Categories
- Do Not Cache Tags
- Do Not Cache Cookies
- Do Not Cache User Agents
- Do Not Cache Roles
An overly broad exclusion can prevent the entire website from being cached.
For example, entering:
/in Do Not Cache URIs may match nearly every page.
Similarly, excluding a cookie that is present for every visitor can effectively disable page caching across the website. LiteSpeed specifically warns that a broadly used cookie in Do Not Cache Cookies can exclude the entire site.
Temporarily remove any custom exclusions that are not clearly required, save the settings and purge all cache before testing again.
Do not remove necessary exclusions for ecommerce, membership or user-specific pages without first understanding what those pages contain.
Solution 5: Check for Cookies That Prevent Guest Caching
A visitor can be logged out of WordPress but still receive cookies from:
- WooCommerce
- Membership plugins
- Currency switchers
- Consent systems
- A/B testing plugins
- Analytics plugins
- Security plugins
- Recently viewed product features
- PHP sessions
Inspect the request under:
Developer Tools > Network > Document > Request HeadersLook for:
Cookie:Then compare the cookies with:
LiteSpeed Cache > Cache > Excludes > Do Not Cache CookiesIf a matching cookie is configured as an exclusion, LiteSpeed will intentionally bypass the cache for that request.
Also look for a PHP session cookie such as:
PHPSESSIDA plugin that starts PHP sessions for every anonymous visitor can interfere with page caching and personalized content. LiteSpeed recommends using cookie-based cache varies instead of PHP-session-dependent pages when different visitors must receive different cached versions.
Solution 6: Check Force Cache Settings Carefully
Go to:
LiteSpeed Cache > Cache > CacheReview:
Force Cache URIs
Force Public Cache URIs
These fields should normally be empty unless you have a specific reason to force caching.
The Force Public Cache URIs option can force matching paths into the public cache even when another part of the website marks them as non-cacheable.
Do not enter:
/or:
*to force the entire website into public cache.
Doing so can accidentally cache:
- Shopping carts
- Checkout pages
- Account pages
- Membership content
- Personalized dashboards
- Password-protected content
- Pages containing security nonces
Use forced public caching only for a specific path that has been thoroughly confirmed to contain identical content for every visitor.
For example:
^/public-information/$ 3600This would apply a one-hour TTL only to that exact public page.
Solution 7: Disable Other Full-Page Caching Systems Temporarily
Multiple page-cache systems can overwrite, hide or replace each other’s headers.
Temporarily check for:
- WP Rocket
- W3 Total Cache
- WP Super Cache
- WP-Optimize page cache
- SiteGround Dynamic Cache
- Varnish
- Nginx FastCGI cache
- Cloudflare Cache Everything rules
- Hosting control-panel page cache
- Another CDN’s HTML caching
Keep only one origin full-page caching system active during troubleshooting.
After disabling the additional cache layer:
- Purge LiteSpeed Cache.
- Purge the CDN.
- Clear the hosting cache.
- Open a private browser.
- Test the page twice.
- Check the headers again.
A CDN may also remove the origin’s X-LiteSpeed-Cache headers or replace them with its own cache-status headers.
Solution 8: Test the Origin Without the CDN
When Cloudflare or another proxy is enabled, the response seen in the browser may not be the same response produced by the origin server.
A CDN can:
- Remove origin headers
- Add its own
Cache-Controlheader - Cache HTML independently
- Bypass the LiteSpeed origin cache
- Serve an older edge-cached response
- Show its own
Ageor cache-status header
Temporarily pause the CDN proxy or use a hosts-file test to connect directly to the origin server.
Then repeat the two-request test.
If the origin returns:
X-LiteSpeed-Cache: hitbut the public CDN URL does not, the issue is probably in the CDN configuration rather than LiteSpeed Cache.
Solution 9: Rebuild the LiteSpeed .htaccess Rules
LiteSpeed Cache uses rules in the WordPress root .htaccess file to communicate with the server cache engine.
Before editing .htaccess, create a backup.
Then go to:
LiteSpeed Cache > CacheSave the settings again.
LiteSpeed recommends re-saving the cache settings when its .htaccess rules need to be regenerated.
Next:
- Go to Settings > Permalinks.
- Do not change the permalink structure.
- Click Save Changes.
- Purge all LiteSpeed cache.
- Retest the page.
Also inspect .htaccess for duplicate blocks from old caching plugins.
Common markers may include:
# BEGIN LSCACHE
# END LSCACHE
and blocks belonging to older cache plugins.
Do not manually delete the LiteSpeed section unless you have a backup and understand the current configuration.
Solution 10: Ask the Host to Re-enable the LiteSpeed Cache Module
If every guest request returns:
X-LiteSpeed-Cache: missor no LiteSpeed cache-status header appears at all, the server-level cache module may be disabled or incorrectly configured.
Ask the hosting provider to verify:
- LiteSpeed Cache Module is enabled
- Public cache is enabled for the virtual host
- The cache root exists
- The cache directory is writable
- The domain points to the correct document root
- LiteSpeed reads the correct
.htaccessfile - No server-level rule disables cache for the domain
- No reverse proxy bypasses LiteSpeed
On cPanel servers, re-enabling LiteSpeed Cache for the account can sometimes restore missing cache functionality. cPanel’s support documentation recommends disabling and then re-enabling cache for affected users when LiteSpeed remains on miss.
Should You Force Cache-Control: public for HTML Pages?
Usually, no.
Adding this header globally:
Cache-Control: public, max-age=604800would allow browsers and shared proxies to retain WordPress HTML pages for one week.
This can cause visitors to receive stale versions of:
- Updated posts
- Navigation menus
- Homepage content
- Product prices
- Stock information
- Forms
- Security tokens
- Login-related content
LiteSpeed’s server cache has WordPress-aware purge rules. A browser cache does not know when a WordPress post, menu, widget or plugin setting has changed.
LiteSpeed therefore recommends avoiding browser caching for dynamic HTML while LSCache is active. Its documentation warns that applying a default expiration to HTML can conflict with LSCache and produce stale content.
A safer HTML response is often:
Cache-Control: no-cache, must-revalidate, max-age=0This does not necessarily disable LiteSpeed’s server-level cache. It instructs the browser to request or revalidate the page instead of keeping an uncontrolled local HTML copy.
When a Public Cache-Control Header May Be Required
A standard public header may be necessary when an external reverse proxy or CDN specifically requires origin cache instructions.
In that situation, it is usually safer to prevent long-term browser storage while giving a shared cache a separate TTL:
Cache-Control: public, max-age=0, s-maxage=3600, must-revalidateThis configuration means:
publicallows shared caches to store the response.max-age=0prevents the browser from treating the page as fresh without revalidation.s-maxage=3600gives a shared proxy a one-hour TTL.must-revalidaterequires stale responses to be checked before reuse.
However, this should only be applied when all personalized and transactional pages are excluded.
Do not apply a public HTML header to:
/wp-admin/
/wp-login.php
/cart/
/checkout/
/my-account/
Also exclude:
- Password-protected pages
- Membership dashboards
- User profile pages
- Preview URLs
- Search results containing private data
- Pages with user-specific pricing
- REST and AJAX responses
- Any page that displays session-dependent content
It is normally better to configure the shared-cache TTL directly in the CDN rather than forcing a global HTML cache header through WordPress.
Optional WordPress Header Configuration
Use the following only when an upstream shared cache explicitly requires a standard public header.
Create a small custom plugin or add the code to an existing site-specific plugin. Do not place important functionality directly in a theme that may be replaced.
<?php
/**
 * Add a shared-cache header to safe guest HTML pages.
 *
 * Use only when a CDN or reverse proxy specifically requires
 * a standard Cache-Control response from WordPress.
 */
add_action( 'send_headers', function () {
	if ( is_admin() || is_user_logged_in() ) {
		return;
	}

	if (
		'GET' !== strtoupper( $_SERVER['REQUEST_METHOD'] ?? '' ) ||
		wp_doing_ajax() ||
		is_preview() ||
		is_search() ||
		is_404()
	) {
		return;
	}

	if (
		function_exists( 'is_cart' ) &&
		( is_cart() || is_checkout() || is_account_page() )
	) {
		return;
	}

	header_remove( 'Pragma' );

	header(
		'Cache-Control: public, max-age=0, s-maxage=3600, must-revalidate',
		true
	);
}, 100 );
This example:
- Runs only for logged-out visitors
- Allows only GET requests
- Excludes administrator and AJAX requests
- Excludes previews, searches and 404 responses
- Excludes WooCommerce cart, checkout and account pages
- Prevents long browser freshness
- Provides a one-hour shared-cache TTL
This code is not required for normal LiteSpeed page caching.
After adding it:
- Purge LiteSpeed Cache.
- Purge the CDN.
- Open a private browser.
- Test public posts and pages.
- Test login and logout.
- Test forms.
- Test WooCommerce cart and checkout.
- Confirm that no private content is cached.
- Confirm that page updates appear after purging.
Remove the code immediately if visitors receive stale or personalized content.
Do Not Add a Global HTML Expires Rule
Avoid rules such as:
ExpiresDefault "access plus 1 week"or:
ExpiresByType text/html "access plus 1 week"These rules can cause the visitor’s browser to serve an old HTML page without making a new request to LiteSpeed.
When an existing .htaccess file contains an HTML expiration rule, LiteSpeed recommends changing it to:
ExpiresByType text/html "access plus 0 seconds"This allows LiteSpeed’s server-level page cache to handle WordPress HTML while preventing uncontrolled browser caching.
Static assets can still use long browser-cache expiration times.
For example:
<IfModule mod_expires.c>
	ExpiresActive On

	ExpiresByType image/jpeg "access plus 1 year"
	ExpiresByType image/png "access plus 1 year"
	ExpiresByType image/gif "access plus 1 year"
	ExpiresByType image/webp "access plus 1 year"
	ExpiresByType image/avif "access plus 1 year"
	ExpiresByType image/svg+xml "access plus 1 year"

	ExpiresByType text/css "access plus 1 year"
	ExpiresByType application/javascript "access plus 1 year"
	ExpiresByType text/javascript "access plus 1 year"

	ExpiresByType font/woff2 "access plus 1 year"

	ExpiresByType text/html "access plus 0 seconds"
</IfModule>
The LiteSpeed Cache plugin’s Browser Cache option is also intended primarily for static resources such as images, CSS, JavaScript and video, not for long-term storage of dynamic WordPress HTML.
Expected Header Examples
Correct first guest request
HTTP/2 200
X-LiteSpeed-Cache: miss
X-LiteSpeed-Cache-Control: public,max-age=604800
This means LiteSpeed did not already have the page, but it was eligible to be stored publicly.
Correct second guest request
HTTP/2 200
X-LiteSpeed-Cache: hit
This means the page was served from LiteSpeed’s cache.
The absence of this standard header is not automatically a problem:
Cache-Control: publicCorrect excluded page
HTTP/2 200
X-LiteSpeed-Cache-Control: no-cache
Cache-Control: no-cache, must-revalidate, max-age=0
This means LiteSpeed intentionally did not publicly cache the page.
Correct logged-in behavior
HTTP/2 200
Cache-Control: no-cache, must-revalidate, max-age=0
Depending on the LiteSpeed configuration, a logged-in request may also be dynamically generated or served from a private cache.
Common Mistakes
Testing while logged in
A logged-in administrator receives different cookies and cache behavior from an anonymous visitor.
Always test in a clean private window.
Checking only Cache-Control
The standard Cache-Control header does not prove whether LiteSpeed’s server-level page cache is working.
Check:
X-LiteSpeed-CacheEnabling Browser Cache and expecting HTML page caching
The LiteSpeed Browser Cache setting mainly applies to static files.
It is not the control that enables public full-page caching.
Forcing the entire website into public cache
Never use / or * in Force Public Cache URIs without a carefully designed cache strategy.
Caching cart and account pages
Pages containing customer-specific information must not be stored in a shared public cache.
Running multiple page-cache plugins
Two page-cache plugins can create duplicate rules, stale content and confusing response headers.
Applying a one-year TTL to HTML
A long TTL is suitable for versioned CSS, JavaScript, fonts and images, but it is usually unsafe for dynamic WordPress HTML.
Recommended LiteSpeed Settings
For a normal WordPress blog, a safe starting point is:
LiteSpeed Cache > Cache > Cache

Enable Cache: ON
Cache Logged-in Users: OFF unless specifically required
Cache Commenters: ON
Cache REST API: ON
Cache Login Page: ON
Cache Mobile: OFF for responsive themes
Force Cache URIs: Empty
Force Public Cache URIs: Empty
Under TTL:
Default Public Cache TTL: 604800
Default Front Page TTL: 86400 or 604800
Default Private Cache TTL: 1800
Under Browser:
Browser Cache: ON
Browser Cache TTL: 31557600
The browser-cache TTL should apply to static assets, while WordPress HTML should continue to be controlled by LiteSpeed’s server-level page cache.
For WooCommerce or membership websites, verify all user-specific pages before using these settings.
Final Solution
A missing standard Cache-Control: public header for logged-out WordPress visitors usually does not indicate a LiteSpeed Cache failure.
LiteSpeed full-page caching is a server-level system. The correct way to confirm it is to request the same public page twice and look for:
X-LiteSpeed-Cache: missfollowed by:
X-LiteSpeed-Cache: hitThe Cache-Control: no-cache header seen by logged-in users is generally intentional because their pages may contain private or personalized information.
The recommended solution is:
- Test while completely logged out.
- Confirm
Enable Cacheis turned on. - Check for
X-LiteSpeed-Cache: hit. - Verify that the server supports LiteSpeed caching.
- Review URI, cookie, user-agent and role exclusions.
- Remove competing page-cache systems.
- Test the origin separately from the CDN.
- Avoid browser-caching dynamic HTML.
- Add a standard public header only when an external shared cache specifically requires one.
- Never publicly cache account, cart, checkout or personalized pages.
For most WordPress websites, no additional Cache-Control: public header needs to be added. If X-LiteSpeed-Cache: hit appears for guest requests, LiteSpeed’s public page cache is functioning correctly.
