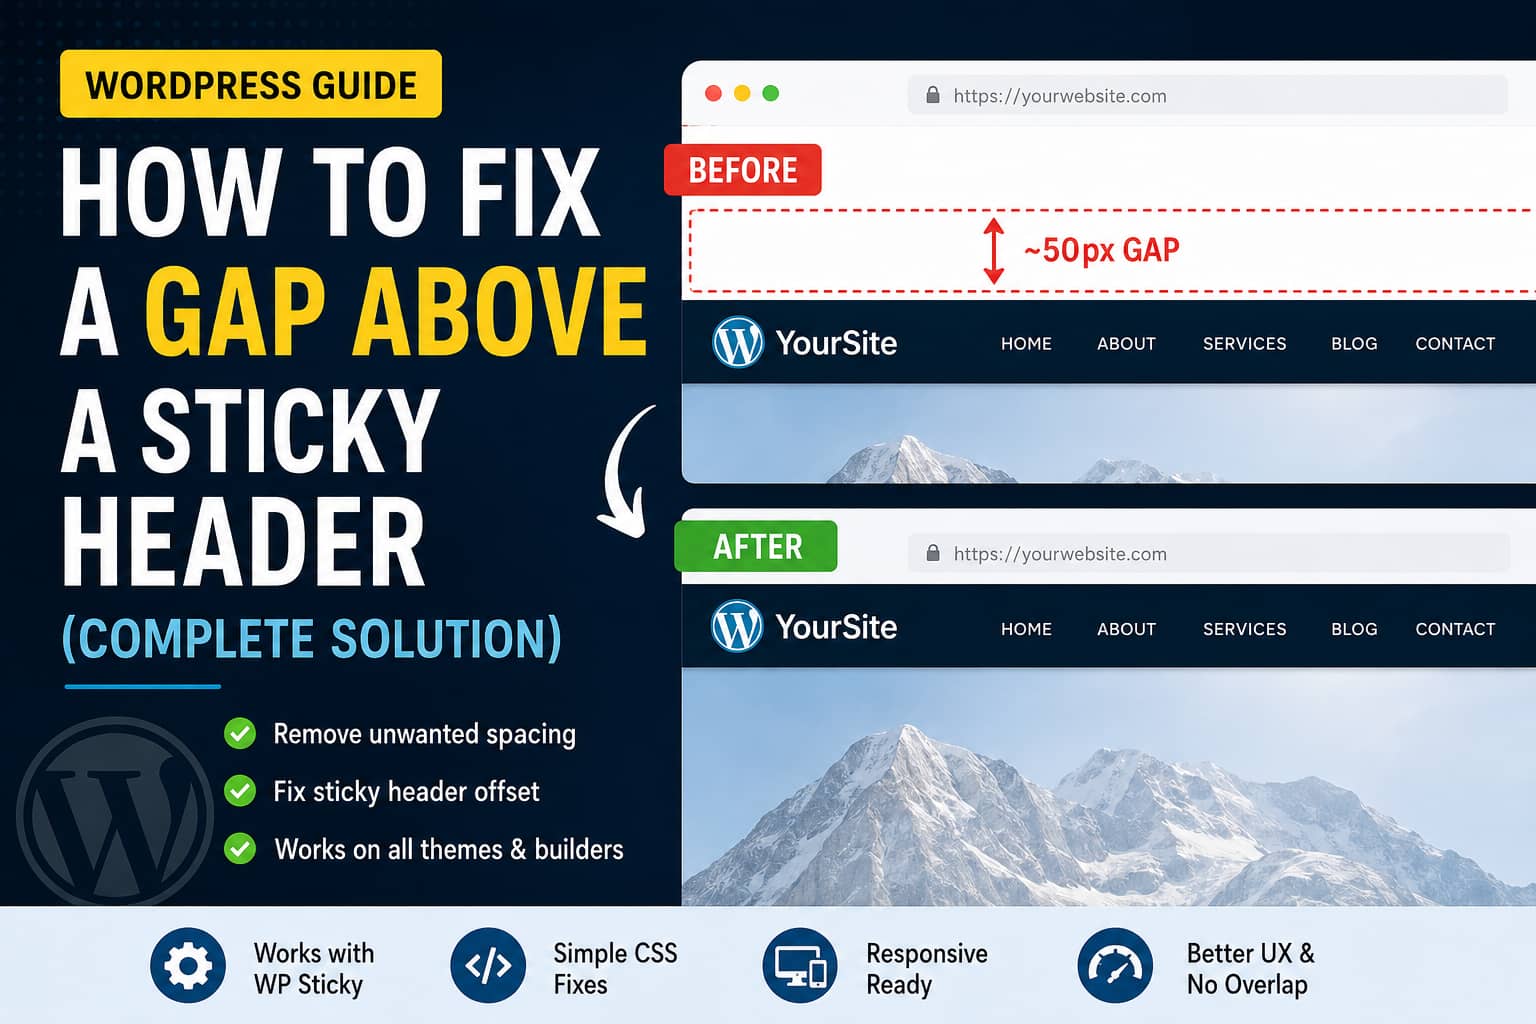
A sticky header should normally sit directly against the top edge of the browser. However, some WordPress users notice a white or empty gap of approximately 30px to 50px above the header.
The problem can continue even after setting the following WP Sticky option to 0px:
Space between top of page and sticky element
This happens because that option controls only the offset applied by the sticky plugin. It does not automatically remove margins, padding, admin-toolbar offsets, page-builder spacing, or positioning rules added by the WordPress theme.
The WP Sticky documentation confirms that the setting is used to place the sticky element a specified distance from the top of the page. The plugin also contains a separate option for accounting for the WordPress administrator toolbar. de explains how to identify the source of the gap and remove it safely.
Symptoms of the Problem
You may be experiencing this issue when:
- A white gap appears above the site header.
- The gap is approximately 30px, 40px, 46px, or 50px high.
- The sticky header works, but it does not touch the top of the browser.
- Setting the plugin’s top spacing to
0pxmakes no difference. - The gap appears only when you are logged into WordPress.
- The gap appears only after scrolling.
- The header looks correct on desktop but has a gap on mobile.
- The problem began after enabling a sticky-header plugin.
- The site uses both a theme sticky header and the WP Sticky plugin.
- Clearing the plugin settings does not remove the space.
The exact cause depends on whether the gap appears before scrolling, after the header becomes sticky, or only while viewing the site as a logged-in administrator.
Why Setting the Sticky Offset to 0px May Not Fix It
The WP Sticky setting controls where the selected sticky element is positioned after it becomes sticky.
Setting it to:
0should tell the plugin not to intentionally add extra spacing above the sticky element.
However, the final position can still be affected by:
- The WordPress admin toolbar
- Header margin
- Header padding
- Parent-container spacing
- A
topCSS property - Body padding added for a fixed header
- Elementor container settings
- Theme sticky-header functionality
- Another sticky-header plugin
- Inline CSS
- Cached or minified CSS
- A transformed parent element
- Incorrect sticky-element selection
The plugin documentation also warns that absolute positioning, negative margins, existing top values, !important declarations, and transformed parent elements can interfere with sticky positioning. Test: Check the Page While Logged Out
The first step is to determine whether the gap is caused by the WordPress admin toolbar.
Open the website in:
- An incognito or private browser window
- A different browser where you are not logged in
- A mobile device where you are not logged into WordPress
If the gap disappears while logged out, the space is probably reserved for the WordPress administrator toolbar.
The admin toolbar normally occupies approximately:
- 32px on desktop
- 46px on smaller screens
A gap close to 46px or 50px on mobile is therefore often related to admin-toolbar handling rather than the public version of the website.
What to Do
Go to:
WordPress Dashboard
Settings
Sticky Menu (or Anything!)
Look for an option similar to:
Check for Admin ToolbarThe option is designed to prevent the sticky element from appearing underneath the WordPress admin bar. ublic site looks correct while logged out, you may not need to change anything. Normal visitors will not see the gap.
If the gap remains visible to logged-out visitors, continue with the following solutions.
Solution 1: Check the Header’s Margin and Padding
The most common cause is spacing applied directly to the header or one of its parent containers.
Open the affected page, right-click the empty area, and select:
InspectIn the browser’s developer tools, select the header and review the Computed panel.
Look for properties such as:
margin-top: 50px;
padding-top: 50px;
top: 50px;
Also inspect the header’s parent elements. The visible gap may belong to a wrapper rather than the header itself.
Common selectors include:
.site-header
#masthead
header
.header-wrapper
.main-header
.elementor-location-header
Example CSS Fix
Go to:
Appearance
Customize
Additional CSS
Add a targeted rule using the selector found on your website:
.site-header {
    margin-top: 0 !important;
    padding-top: 0 !important;
}
For themes that use #masthead, use:
#masthead {
    margin-top: 0 !important;
    padding-top: 0 !important;
}
Do not copy every selector blindly. Use the selector that belongs to the affected header.
Solution 2: Remove the Offset Only While the Header Is Sticky
WP Sticky adds state classes to the selected element, including:
.element-is-sticky
.element-is-not-sticky
These classes can be used to apply a correction only after the header becomes sticky. `css
.element-is-sticky {
top: 0 !important;
margin-top: 0 !important;
}
If the gap exists only after scrolling, this may solve the problem without changing the header’s normal position.

You can make the selector more specific when necessary:

```css
.site-header.element-is-sticky {
    top: 0 !important;
    margin-top: 0 !important;
}
After applying the code, test the header at the top of the page and after scrolling.
Solution 3: Check for Body Padding Added by the Theme
Themes and custom header code sometimes add top padding to the entire page to prevent a fixed header from covering the content.
For example:
body {
    padding-top: 50px;
}
This is useful when the header is fixed at all times. However, it can create an unwanted gap when a plugin already handles the sticky positioning.
Inspect the <body> element and look for:
padding-top
margin-top
If you find an unnecessary value, override it with:
body {
    padding-top: 0;
    margin-top: 0;
}
Use this rule carefully. Removing body padding can cause the header to overlap the first section of the page.
A safer targeted approach is:
body:not(.admin-bar) {
    padding-top: 0;
}
This preserves any spacing that may be needed while the admin toolbar is visible.
Solution 4: Check Elementor Header Spacing
When the header is built with Elementor, the gap may come from the header template rather than the sticky plugin.
Go to:
Templates
Theme Builder
Header
Edit with Elementor
Select the outermost header container or section.
Under Advanced, check:
- Margin
- Padding
- Positioning
- Motion Effects
- Transform
- Entrance Animation
Set the top margin and top padding to:
0Check desktop, tablet, and mobile values separately. Elementor allows each device to have different spacing.
Check Elementor Sticky Settings
If WP Sticky is managing the sticky behavior, Elementor should not normally apply another sticky effect to the same header.
Select the outer header container and go to:
Advanced
Motion Effects
Sticky
Set it to:
NoneThen allow WP Sticky to control the element.
Alternatively, disable WP Sticky and use Elementor’s sticky option. Avoid running both systems on the same header unless the configuration has been tested carefully.
Solution 5: Disable the Theme’s Built-In Sticky Header
Many WordPress themes already include a sticky-header feature.
Possible locations include:
Appearance
Customize
Header
Sticky Header
or:
Theme Options
Header
Sticky Navigation
If the theme and WP Sticky both attempt to control the same header, they may apply competing values such as:
position: fixed;
top: 0;
top: 32px;
transform: translateY(...);
margin-top: 50px;
Temporarily disable the theme’s sticky-header option and test WP Sticky by itself.
If the gap disappears, use only one sticky-header system:
- The theme’s built-in sticky header
- Elementor sticky positioning
- WP Sticky
- A custom CSS sticky header
Using one system is usually more reliable than combining several.
Solution 6: Select the Correct Sticky Element
Selecting an inner navigation element can leave the outer header wrapper in its original position.
For example, you may have selected:
.main-navigationwhile the complete header is:
.site-headerIf the outer .site-header contains 50px of padding, making only .main-navigation sticky will not remove that spacing.
Open the page in developer tools and identify the highest-level element that contains the complete header.
Possible correct selectors include:
#masthead
.site-header
header.main-header
.elementor-location-header
Enter the unique selector into the plugin’s sticky-element field.
The plugin documentation states that the selector should identify one unique element. A class selector must begin with a period, while an ID selector must begin with a hash symbol. :
.site-headeror:
#mastheadAvoid a selector that matches multiple elements.
Solution 7: Remove a Conflicting Top Property
A theme may contain a rule such as:
.sticky-header {
    top: 50px;
}
The plugin can be set to 0px, but a more specific theme rule or an !important declaration may still win.
Use developer tools to inspect the sticky header and check which rule controls the top property.
Override it with a sufficiently specific selector:
header.site-header.element-is-sticky {
    top: 0 !important;
}
When the WordPress admin bar must remain visible, use:
body.admin-bar header.site-header.element-is-sticky {
    top: 32px !important;
}

@media screen and (max-width: 782px) {
    body.admin-bar header.site-header.element-is-sticky {
        top: 46px !important;
    }
}
This keeps the header below the admin toolbar for logged-in users while placing it at the top for normal visitors.
Solution 8: Check Parent Elements for CSS Transform
Sticky and fixed positioning can behave unexpectedly when a parent element uses:
transform: translate(...);
transform: translate3d(...);
transform: scale(...);
filter: ...;
perspective: ...;
The WP Sticky FAQ specifically identifies a transformed parent element as a possible source of positioning problems. every parent of the header and look for a transform property.
A temporary test can be performed with:
.header-parent-selector {
    transform: none !important;
}
Replace .header-parent-selector with the actual parent class.
Be careful when removing transforms because themes may use them for animations, off-canvas menus, or layout effects.
Solution 9: Test Legacy Mode
WP Sticky provides a Legacy Mode that uses an older sticky-element method.
Go to the plugin’s advanced settings and locate:
Legacy ModeTry changing its current state:
- If it is enabled, disable it.
- If it is disabled, enable it temporarily.
Save the settings, clear the cache, and test again.
The plugin documentation explains that the modern mode makes the original element sticky, while Legacy Mode may use a cloned version. Depending on the theme’s CSS and JavaScript, one method may work better than the other. hange several settings at once. Change one option, clear the cache, and retest so you can identify which adjustment solved the issue.
Solution 10: Enable the Plugin’s Debug Mode
The plugin includes a Debug Mode that can report problems with the configured selector.
Enable:
Debug ModeThen reload the page and open the browser console:
F12
Console
Look for errors indicating that:
- The configured selector does not exist.
- More than one element matches the selector.
- JavaScript failed before the sticky element initialized.
- Another script interrupted the plugin.
The official plugin FAQ recommends Debug Mode when the sticky element does not behave correctly. oubleshooting, disable Debug Mode.
Solution 11: Clear All Cache and Optimized CSS
A correct CSS or plugin-setting change may not appear immediately when an older stylesheet is cached.
Clear all available cache layers:
- Browser cache
- WordPress caching plugin
- Hosting cache
- Cloudflare or another CDN
- Redis or Memcached object cache
- Minified CSS
- Combined CSS
- Critical CSS
- Elementor-generated CSS
For Elementor, go to:
Elementor
Tools
Regenerate CSS & Data
Then open the site in an incognito window and test again.
Temporarily disable CSS optimization if the old top-spacing rule continues loading.
A Safe CSS Starting Point
The following example removes spacing from a typical site header and resets the sticky offset:
.site-header {
    margin-top: 0 !important;
    padding-top: 0 !important;
}

.site-header.element-is-sticky {
    top: 0 !important;
    margin-top: 0 !important;
}
When the header uses the #masthead ID, use:
#masthead {
    margin-top: 0 !important;
    padding-top: 0 !important;
}

#masthead.element-is-sticky {
    top: 0 !important;
    margin-top: 0 !important;
}
Do not add both versions unless both selectors belong to the same header.
How to Find the Exact Rule Creating the Gap
You can identify the responsible CSS rule through the browser’s developer tools.
- Open the page in Chrome or Firefox.
- Right-click directly inside the gap.
- Select Inspect.
- Move upward and downward through the HTML elements.
- Watch which element becomes highlighted over the empty area.
- Open the Computed styles panel.
- Search for
margin,padding,top, andtransform. - Uncheck suspicious rules temporarily.
- Confirm which rule removes the gap.
- Copy the responsible selector and create a targeted override.
For example, the Computed panel may show:
padding-top: 48px;Clicking that value should reveal the stylesheet and selector that added it.
This is more reliable than adding random negative margins.
Why Negative Margins Are Not the Best Fix
You may find suggestions such as:
.site-header {
    margin-top: -50px;
}
Although this can visually hide the gap, it does not fix the underlying positioning conflict.
Negative margins can cause:
- Header overlap
- Mobile layout problems
- Hidden content
- Incorrect scroll positions
- Problems with the WordPress admin toolbar
- Unexpected behavior after theme updates
Use a negative margin only as a carefully tested last resort. Removing the original padding, margin, or top value is normally safer.
Recommended Troubleshooting Order
Use the following order to avoid unnecessary changes:
- Test the page while logged out.
- Confirm whether the gap appears before or after scrolling.
- Inspect the header’s
margin-top,padding-top, andtop. - Inspect the header’s parent container.
- Check Elementor or the theme’s header spacing.
- Disable duplicate sticky-header systems.
- verify that WP Sticky is targeting the outer header wrapper.
- Check for transformed parent elements.
- Test Legacy Mode.
- Enable Debug Mode and review the browser console.
- Clear all cache and regenerated CSS.
- Add a targeted CSS override only after identifying the source.
Frequently Asked Questions
Why is there still a gap when the WP Sticky top spacing is set to 0px?
The setting controls the offset added by WP Sticky. A theme, page builder, admin-toolbar adjustment, parent container, or another sticky-header system may still add margin, padding, or a top value.
Why does the gap appear only when I am logged into WordPress?
The plugin may be positioning the header below the WordPress administrator toolbar. Test the public site in an incognito window before changing the header position.
Why is the gap approximately 46px on mobile?
The mobile WordPress admin toolbar is commonly taller than the desktop toolbar. A gap around 46px that appears only while logged in is usually related to admin-bar compensation.
Can Elementor and WP Sticky be used together?
Yes, but only one system should normally control the sticky behavior of a particular header. Disable Elementor’s sticky motion effect when WP Sticky is managing the same element.
Can I remove the gap with CSS?
Yes, but identify which element creates the space first. A targeted rule for the header or sticky state is safer than resetting margins and padding across the entire website.
Should I use html, body { margin: 0; }?
WordPress themes normally reset the browser’s default body margin already. Applying a global reset may not fix a 50px header gap and could affect other layout elements. Inspect the header and its wrapper before adding a global rule.
Why does the header position change only after scrolling?
The non-sticky and sticky versions may use different CSS classes or inline positioning. Inspect the element before scrolling and again after .element-is-sticky has been applied.
Final Recommendation
When a gap remains above a WordPress sticky header after setting the plugin’s spacing option to 0px, the plugin setting is usually not the only positioning rule involved.
First, check the page while logged out. A gap visible only to administrators is likely reserved for the WordPress toolbar.
If public visitors also see it, inspect the header and its parent containers for margin, padding, top, transform, or body-offset rules. Then check whether Elementor, the active theme, or another plugin is applying a second sticky-header system.
For a gap that appears only after scrolling, a targeted rule such as the following may be enough:
.site-header.element-is-sticky {
    top: 0 !important;
    margin-top: 0 !important;
}
Replace .site-header with the actual selector used by the website.
The correct solution is to remove the rule creating the space rather than hiding it with a negative margin. After making the change, clear all cache layers and test the website while logged out on desktop, tablet, and mobile.
