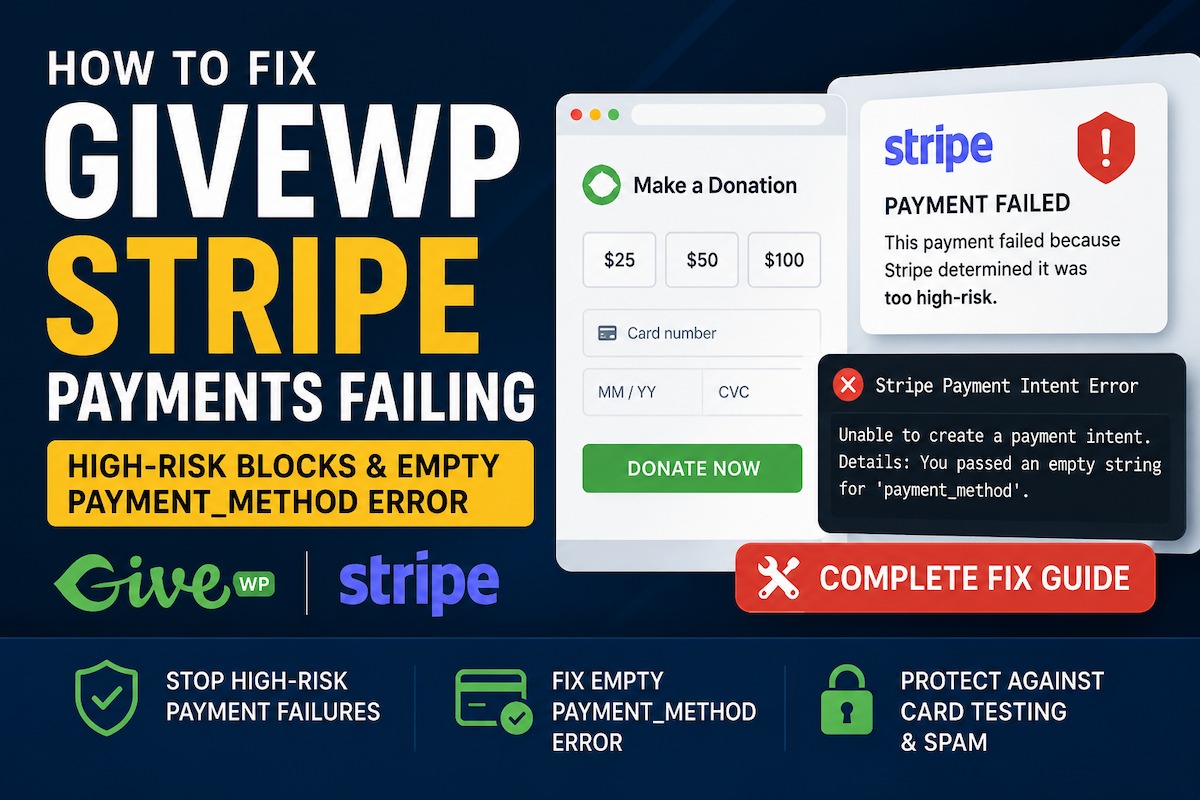
GiveWP Stripe payments failing can be caused by two very different problems: Stripe Radar blocking suspicious transactions or the donation form failing to create a valid Stripe payment method.
A common example is seeing dozens of failed donations in GiveWP while Stripe reports:
This payment failed because Stripe determined it was too high-risk.At the same time, the GiveWP logs may contain this error:
Stripe Payment Intent Error

Unable to create a payment intent. Details: You passed an empty
string for 'payment_method'. We assume empty values are an attempt
to unset a parameter; however 'payment_method' cannot be unset.
You should remove 'payment_method' from your request or supply a
non-empty value.
Although these messages appear related, they do not necessarily describe the same payment attempt.
The high-risk message usually means Stripe received and evaluated a payment before blocking it. The empty payment_method error means GiveWP attempted to submit a payment request without receiving a valid payment-method ID from the browser.
In many cases, a sudden increase in both errors indicates automated card testing. However, a JavaScript, caching, plugin, or Stripe connection problem can produce the same GiveWP log for legitimate donors.
This guide explains how to identify the actual cause and apply the correct solution.
What Does “Stripe Determined It Was Too High-Risk” Mean?
Stripe Radar evaluates payment attempts using signals such as:
- Card history across the Stripe network
- Device and browser information
- IP address and location
- Donor email address
- Billing details
- Previous payment attempts
- CVC and postal-code verification
- Transaction velocity and behavior
When Stripe categorizes a payment at its highest risk level, Radar blocks it by default. Stripe normally does not send a Radar-blocked high-risk payment to the card issuer for authorization.
A Stripe payment may show information similar to:
Type: blocked
Reason: highest_risk_level
Risk level: highest
Network status: not_sent_to_network
Seller message: Stripe blocked this charge as too risky.
This generally means Stripe’s fraud protection is working as intended. It does not automatically mean the GiveWP integration is broken.
What Does the Empty payment_method Error Mean?
Stripe uses a PaymentMethod object to represent the card, bank account, wallet, or another payment method selected by the donor.
A valid Stripe PaymentMethod ID normally looks similar to:
pm_1ABC234ExampleWhen GiveWP sends a payment request, the request should contain a valid PaymentMethod ID or use a Stripe payment flow that attaches the payment method separately.
Stripe’s API expects the payment_method parameter, when supplied, to contain a valid PaymentMethod, Card, or compatible Source ID.
The following is valid:
payment_method=pm_1ABC234ExampleThe following is not a usable payment method:
payment_method=The GiveWP error means the expected Stripe payment-method value was empty when the server attempted to process the donation.
Are the High-Risk Block and Empty Payment Method the Same Error?
Not necessarily.
If a Stripe payment was evaluated and blocked as too risky, Stripe usually received enough payment data to run its fraud checks.
If GiveWP reports that payment_method was empty, that particular request may have failed before a usable payment method was attached.
Therefore, the website may be receiving two types of attempts:
- Automated attempts that successfully create a Stripe payment method but are blocked by Radar.
- Automated or broken form submissions that reach GiveWP without creating a payment method.
A bot can load or submit parts of a donation form without completing the normal Stripe.js process. Some automated attempts may therefore produce a Stripe Radar block, while others produce an empty payment_method error.
This is a likely explanation when many failures appear within a short period, especially when they contain unusual names, invalid email addresses, repeated amounts, or donors from unrelated locations. Donation and “pay what you want” forms are common targets for card testing.
However, do not assume every failure is fraudulent without testing the form.
How to Determine Whether It Is Spam or a Website Problem
Use the following process before changing Stripe Radar settings or editing GiveWP code.
Step 1: Compare the Failed Attempts in Stripe and GiveWP
Select five or more failed donations and compare:
- Exact date and time
- Donation amount
- Donor email
- Donor name
- Donation form
- Stripe PaymentIntent ID
- GiveWP donation ID
- IP address, when available
Remember that Stripe may display timestamps in a different timezone from WordPress. Convert both timestamps to the same timezone before comparing them.
When the Failure Is Probably Fraudulent
It is probably card testing when you see:
- Many failures within minutes or hours
- Several different cards from one IP address
- One card attempted from several identities
- Very small or unusual donation amounts
- Random names or email addresses
- Geographic mismatches
- Repeated CVC or postal-code failures
- Stripe risk level marked as highest
- Stripe stating that the payment was blocked as too risky
- The card network status showing
not_sent_to_network
Stripe’s Related Payments and Risk Insights tools can help identify payment attempts connected by IP address, card, or customer information.
When the Failure May Be a Website Problem
Investigate the website when:
- Known donors report being unable to donate
- A test donation from your own browser fails
- Every payment produces an empty
payment_method - No corresponding payment appears in Stripe
- The browser console contains JavaScript errors
- Stripe.js fails to load
- The issue began after a plugin, theme, caching, or CDN change
- The payment form stops responding after clicking Donate
- Apple Pay, Google Pay, or card fields do not appear correctly
It is possible to have a card-testing attack and a website JavaScript problem at the same time.
Step 2: Test the GiveWP Stripe Integration
Do not test a live donation form repeatedly with real card details.
First, create a backup and use a staging environment when possible. Then enable GiveWP Test Mode.
In WordPress, go to:
Donations > Settings > Payment GatewaysEnable:
Test ModeOpen the donation form in a private or incognito browser window and complete a test donation with Stripe’s standard successful test card:
Card number: 4242 4242 4242 4242
Expiration: Any future date
CVC: Any three digits
Postal code: Any valid postal code
GiveWP recommends using Test Mode to confirm that Stripe donations work before accepting live payments.
After submitting the form, confirm all of the following:
- The donation reaches the confirmation page.
- The test donation appears in GiveWP.
- A PaymentIntent appears in Stripe Test Mode.
- The GiveWP log does not show an empty payment method.
- No JavaScript error appears in the browser console.
Disable Test Mode after testing so real donors are not accidentally sent through Stripe’s test environment.
Step 3: Check the Browser Console
Open the donation form in Google Chrome.
Press:
F12Select the Console tab, reload the page, and submit a test donation.
Look for errors such as:
Stripe is not definedFailed to load resourceContent Security Policy blocked the resourceUncaught TypeError403 Forbidden429 Too Many RequestsMixed ContentAlso open the Network tab and confirm that Stripe’s JavaScript loads successfully from:
js.stripe.comA JavaScript error can prevent the browser from creating a payment method. GiveWP may then receive an empty value when the form is submitted.
Step 4: Update GiveWP and Its Stripe Integration
Before updating a live fundraising website:
- Create a complete file and database backup.
- Copy the site to staging.
- Test the donation form on staging.
- Update GiveWP core.
- Update the GiveWP Stripe add-on, when separately installed.
- Update WordPress.
- Update compatible themes and supporting plugins.
- Run the GiveWP database-update routine if requested.
- Test another Stripe donation.
GiveWP recommends keeping its core plugin and add-ons updated because newer releases include compatibility improvements, security updates, and bug fixes. It also recommends testing updates on staging and taking a backup first.
Do not directly edit GiveWP or Stripe plugin files. Any modification will be lost during the next update and may create a security or PCI-compliance risk.
Step 5: Verify the Stripe Connection
Go to the Stripe settings inside GiveWP and verify:
- The intended Stripe account is connected.
- Live Mode is connected to the live Stripe account.
- Test Mode is connected to the correct test environment.
- The account has no outstanding verification requirements.
- The expected payment methods are enabled.
- There are no expired or manually replaced credentials.
- The site URL matches the current production domain.
If the site was migrated, cloned, or restored from an old backup, reconnecting Stripe may be necessary.
Do not disconnect a working live Stripe account during a fundraising campaign without first creating a backup and recording the existing configuration.
Step 6: Clear Caches and Disable JavaScript Optimization
Payment forms depend on JavaScript running in the correct order. Delaying, combining, or rewriting GiveWP and Stripe scripts can prevent payment-method creation.
Temporarily disable the following on the donation page:
- JavaScript delay
- JavaScript defer
- JavaScript combination
- JavaScript minification
- Cloudflare Rocket Loader
- Aggressive HTML minification
- Full-page caching
- Guest-page optimization
- Script-manager rules that unload GiveWP assets
GiveWP specifically notes that Cloudflare Rocket Loader can conflict with GiveWP JavaScript and recommends disabling it while troubleshooting GiveWP JavaScript problems.
Exclude the following from optimization where your caching plugin supports exclusions:
js.stripe.comAlso exclude the GiveWP donation-form scripts, the donation page, donation confirmation page, and donor dashboard from page caching or delayed JavaScript execution.
The exact GiveWP filenames may change between versions, so it is safer to exclude scripts by their GiveWP or Stripe source rather than relying only on one fixed filename.
After changing optimization settings:
- Clear the WordPress cache.
- Clear the server cache.
- Clear the CDN cache.
- Open a fresh incognito window.
- Test the donation again.
Step 7: Test for a Plugin or Theme Conflict
Perform conflict testing on staging rather than on the live donation website.
Use this process:
- Switch temporarily to a default WordPress theme.
- Keep GiveWP and the required Stripe gateway active.
- Disable other plugins.
- Test a Stripe donation.
- Reactivate plugins one at a time.
- Test after each activation.
- Re-enable the original theme last.
Pay particular attention to:
- Performance plugins
- Security plugins
- CAPTCHA plugins
- Cookie-consent tools
- JavaScript managers
- Cloudflare integrations
- Form plugins
- Custom checkout code
- Content Security Policy plugins
- Plugins that modify REST API or AJAX requests
When the error returns after activating a specific plugin, inspect that plugin’s settings or contact its developer.
Step 8: Add Cloudflare Turnstile to GiveWP
When the donation form is receiving automated submissions, add server-validated bot protection.
GiveWP provides a Cloudflare Turnstile integration for donation forms built with its Visual Donation Form Builder. Turnstile helps verify human interaction without requiring most genuine donors to solve image puzzles.
Install the GiveWP Turnstile Integration
In WordPress, go to:
Plugins > Add New PluginSearch for:
Give – Cloudflare TurnstileConfirm that the plugin author is GiveWP, then install and activate it.
Create the Turnstile Keys
In the Cloudflare dashboard:
- Open Turnstile.
- Create a new site.
- Add the donation website’s domain.
- Choose the recommended managed widget.
- Copy the Site Key.
- Copy the Secret Key.
In WordPress, go to:
Donations > Settings > Security > Cloudflare TurnstileEnter both keys and save the settings.
Test the donation form from a logged-out incognito window.
Important Limitation
GiveWP’s Cloudflare Turnstile integration applies to forms built with the Visual Donation Form Builder. It does not protect older legacy or option-based donation forms.
For a legacy form, consider migrating it to the Visual Donation Form Builder or adding another CAPTCHA solution that performs server-side validation.
A CAPTCHA displayed only in the browser but not validated by the server can be bypassed by bots.
Step 9: Add Rate Limiting
CAPTCHA should be combined with rate limiting when an attack is active.
Stripe recommends using several protections together, including CAPTCHA, rate limits, login or session validation, and Radar rules. A single IP block is often insufficient because card testers can distribute attempts across many addresses.
You can add rate limiting through:
- Cloudflare WAF
- A hosting firewall
- A web application firewall
- A properly configured WordPress security plugin
- Server-level Nginx or Apache rules
Apply rate limiting to the actual donation-submission request rather than blocking the entire donation page.
Use the browser’s Network panel to identify the POST request used when a donation is submitted. GiveWP’s submission endpoint can differ depending on the form version and gateway configuration.
A reasonable starting policy is to issue a managed challenge when one IP address produces an unusual number of donation submissions within a short period. Monitor legitimate donors closely and adjust the threshold based on normal website traffic.
Avoid an overly strict permanent block that could prevent several genuine donors using the same office, school, church, or public network from donating.
Step 10: Temporarily Restrict Custom Donation Amounts
Donation forms with very small custom amounts are attractive to card testers because a fraudster can test cards without attempting a large transaction.
During an active attack, consider:
- Setting a sensible minimum donation amount
- Temporarily disabling custom amounts
- Offering fixed donation levels
- Preventing zero-value submissions
- Limiting repeated attempts against the same form
This should be used alongside Turnstile and rate limiting, not as the only protection. Card testers can simply change the amount when no other controls exist.
Step 11: Review Stripe Radar Without Weakening It
Do not disable Stripe’s default rule that blocks highest-risk payments simply to increase the success rate.
High-risk transactions can later produce:
- Fraud disputes
- Chargebacks
- Dispute fees
- Increased account scrutiny
- Card-network monitoring
- Financial losses
Stripe states that high-risk payments are blocked by default because they are considered likely to be fraudulent.
For each blocked payment, review:
- Risk level
- Risk reason
- CVC result
- Postal-code result
- Billing address
- IP location
- Card country
- Donor email
- Related payments
- Radar rule that caused the block
Handling a Verified Legitimate Donor
When you personally verify that a blocked donor is legitimate, Stripe may provide an Add to allow list option.
Adding a donor or payment method to an allow list does not retry the failed payment. The donor must submit a new donation afterward.
Do not allow-list a donor only because they emailed saying their payment failed. Verify the donor and transaction first.
Optional 3D Secure Rules
Stripe Radar for Fraud Teams can create custom rules that request 3D Secure authentication for particular elevated-risk transactions.
This can add authentication instead of immediately accepting or blocking some suspicious attempts. However, do not force 3D Secure indiscriminately without reviewing donor locations and conversion impact.
Step 12: Refund Suspicious Payments That Succeeded
Card testing does not always fail. Some stolen cards may successfully authorize before the attack is detected.
Review successful donations made during the suspicious period.
Look for:
- Extremely small donations
- Random names
- Disposable email addresses
- Repeated IP addresses
- Multiple cards from one donor identity
- Many donor identities using one card
- Country or location inconsistencies
Stripe recommends refunding fraudulent card-testing payments that succeed to reduce the risk of later disputes.
Refund the payment back to the original card. Never send a refund through bank transfer, check, PayPal, cryptocurrency, or another payment method requested by the supposed donor.
Why You Should Not Remove payment_method From GiveWP Code
The Stripe error says to remove payment_method from the request or supply a non-empty value.
That does not mean you should edit GiveWP and delete the parameter.
The GiveWP Stripe integration normally expects the browser to create or select a valid payment method. Removing the field manually could:
- Break PaymentIntent confirmation
- Prevent Strong Customer Authentication
- Break recurring donations
- Cause compatibility problems
- Create a payment without a usable funding source
- Be overwritten by a plugin update
The correct solution is to determine why GiveWP received an empty value.
Possible upstream causes include:
- A bot bypassing the donation interface
- Stripe.js failing to load
- JavaScript optimization
- A plugin conflict
- A theme conflict
- A blocked REST API or AJAX request
- Cloudflare Rocket Loader
- A Content Security Policy restriction
- An outdated GiveWP gateway
- A stale Stripe connection
- A browser extension or ad blocker
Fix the source of the missing payment method instead of modifying the gateway’s core request.
Webhooks Are Probably Not the Cause of This Error
Stripe webhooks are important for updating a donation after Stripe processes it.
However, the empty payment_method error occurs while GiveWP is trying to create or confirm the payment. This happens before a successful payment can generate the normal completion events.
A broken webhook can cause symptoms such as:
- Stripe shows payment succeeded, but GiveWP remains pending
- Recurring donation status is not updated
- Refund status does not synchronize
- Donation completion emails are delayed
A webhook problem does not normally cause the browser to submit an empty Stripe payment method.
Check webhooks when payment status synchronization is failing, but focus first on JavaScript, bot traffic, and the Stripe connection for this particular error.
Recommended Final Configuration
For most GiveWP sites affected by this problem, use the following configuration:
- Keep GiveWP and the Stripe integration updated.
- Test Stripe in GiveWP Test Mode.
- Exclude GiveWP and Stripe scripts from delay and optimization.
- Disable Cloudflare Rocket Loader on donation forms.
- Add GiveWP Cloudflare Turnstile.
- Add conservative rate limiting at the firewall level.
- Keep Stripe’s highest-risk block enabled.
- Review successful suspicious donations and refund confirmed fraud.
- Monitor GiveWP logs and Stripe payments after making changes.
- Investigate JavaScript errors when legitimate test donations still fail.
Frequently Asked Questions
Is Stripe simply doing its job by blocking these payments?
When Stripe explicitly says a payment was blocked because it was too high-risk, Stripe Radar is doing its job.
However, the GiveWP empty payment_method error should still be investigated. It may be a separate bot submission, or it may indicate that legitimate visitors are experiencing a broken payment form.
Does 33 failed donations in one week indicate card testing?
A sudden cluster of failures can indicate card testing, especially when the attempts use strange identities, low amounts, different cards, repeated IP addresses, or a highest-risk classification.
The number alone is not conclusive. Compare the attempts and run a controlled test donation.
Should I disable Stripe Radar to accept more donations?
No. Disabling high-risk protection may allow stolen cards to succeed and later create disputes.
Review false positives individually and allow-list only donors you have verified.
Will Cloudflare Turnstile completely stop card testing?
No single protection guarantees that card testing will stop.
Stripe recommends combining CAPTCHA, rate limiting, payment data, session controls, and fraud rules.
Why does no failed payment appear in Stripe?
When GiveWP fails before creating a valid PaymentIntent or attaching a payment method, Stripe may not have a complete payment to display.
Check GiveWP logs, browser errors, network requests, and payment-form scripts.
Should I delete failed donations from GiveWP?
Keep the records until the investigation is complete. They can help identify timestamps, email patterns, amounts, forms, and attack behavior.
After documenting the incident, you can clean up failed records according to your organization’s data-retention policies.
Final Conclusion
GiveWP Stripe payments failing with a high-risk warning and an empty payment_method error do not automatically point to one single cause.
Stripe’s high-risk message usually means Radar evaluated the transaction and blocked it as suspicious. A sudden surge in these blocks often indicates a card-testing attack.
The GiveWP error means a different request may have reached the server without a valid Stripe PaymentMethod ID. Bots can cause this by bypassing the normal form flow, but legitimate donors can also encounter it when Stripe.js is broken by caching, JavaScript optimization, plugin conflicts, Cloudflare Rocket Loader, or an outdated integration.
The most effective solution is to:
- Confirm the failures by matching timestamps and payment records.
- Test a legitimate donation in Stripe Test Mode.
- Update GiveWP and its Stripe integration.
- fix JavaScript and caching conflicts.
- Protect the form with Cloudflare Turnstile.
- Add carefully configured rate limiting.
- Keep Stripe Radar’s high-risk protection enabled.
- Refund fraudulent payments that succeeded.
After these changes, monitor GiveWP and Stripe for at least several days. If legitimate test payments continue producing an empty payment_method, collect the GiveWP system information, gateway logs, browser-console output, donation-form URL, and exact timestamps before contacting GiveWP support.
